
PRODUCT GUIDE · HOSTED PILOT
Start with what you have.
Keep track of what’s next.
Bring your spreadsheet, add the basics, and build from there. This walkthrough shows how your software, contracts, and employee records fit together.
01 / GET ORGANIZED
Bring your records.
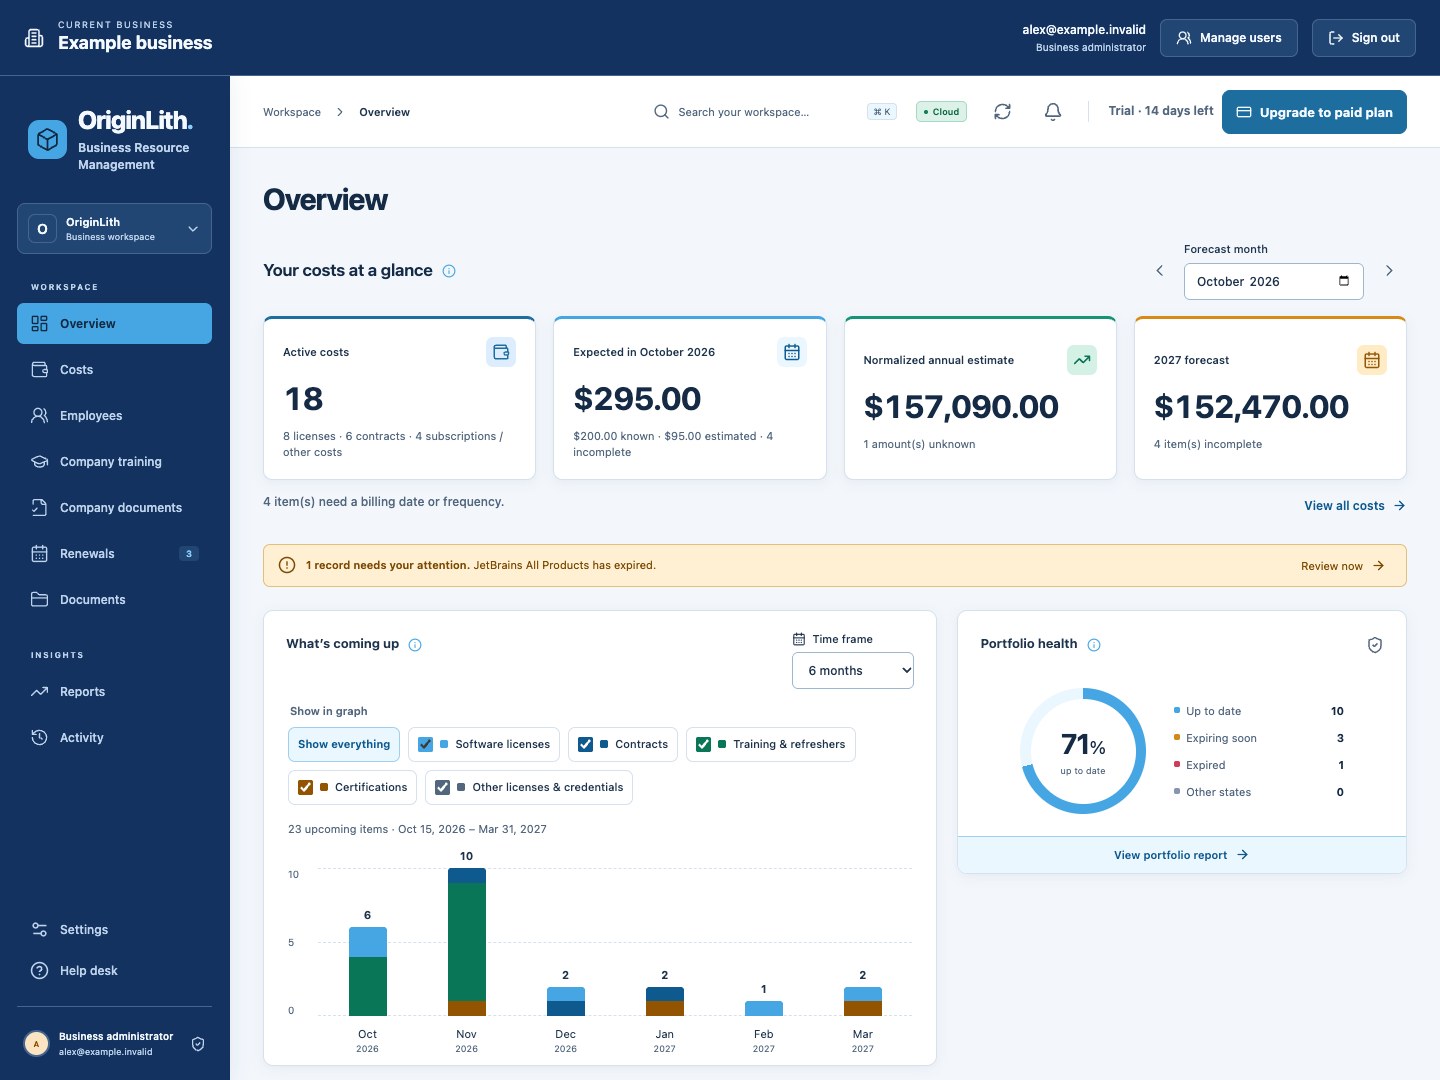
Your new trial starts with your own employee profile and an otherwise empty workspace. Start with a few records to get familiar with the fields, then bring over the rest.
- Add employees first. Open Employees and add the people you track, including their employee IDs, teams, and roles. You can then select them as owners or assign training and software.
- Download the right template. Use the template on the relevant screen. In Costs, choose the software license or contract import; employees, company training, and employee credentials have their own templates.
- Copy in your information. Keep the column headings and put one item on each row. Use
YYYY-MM-DDfor dates. Save as CSV, or paste your spreadsheet rows into the import window. - Review before importing. Choose Import, match the columns, and preview the rows. Correct any errors before confirming. Start with a small batch; the hosted pilot and your employee limit may require splitting larger files.
02 / SOFTWARE LICENSES
Know the cost and the next renewal.
Use one software license record for a subscription or license you buy, such as Jira, Microsoft 365, or ChatGPT. This is separate from an employee’s professional license or certification.
- Open Costs → Add cost → Software license. Enter its name, description and vendor. Business owners, vendor contacts and the renewal date are optional. Use the Type filter to see just software licenses later.
- In Cost & billing schedule, choose Set / known amount for a set price or Variable / estimated for a changing bill. Enter the full amount for all users, choose a billing frequency, and set the first billing date.
- Expand Advanced options when you need lifecycle details, contacts, automatic renewal, or cancellation notice requirements.
- For a variable bill you already paid, expand Add an actual payment (optional) below the estimate and enter its date and amount before saving. Known-price bills are recorded in Payments after saving the license. A billing schedule never marks a bill paid. Use its Documents tab for invoices, Payments for spending history, Contracts for linked agreements, and Members to assign existing employees.
Check Overview for the dates and record types you choose, or use Renewals to narrow the list. Use Renewed on a software license or contract to review and confirm its next renewal date. It does not create a payment. Per-item notification controls are beside the renewal terms, with cancellation notice kept optional. Notification settings currently support the app’s inbox; automatic customer reminder emails are not connected yet.
03 / ACTUAL PAYMENTS
Keep business costs and actual expenses together.
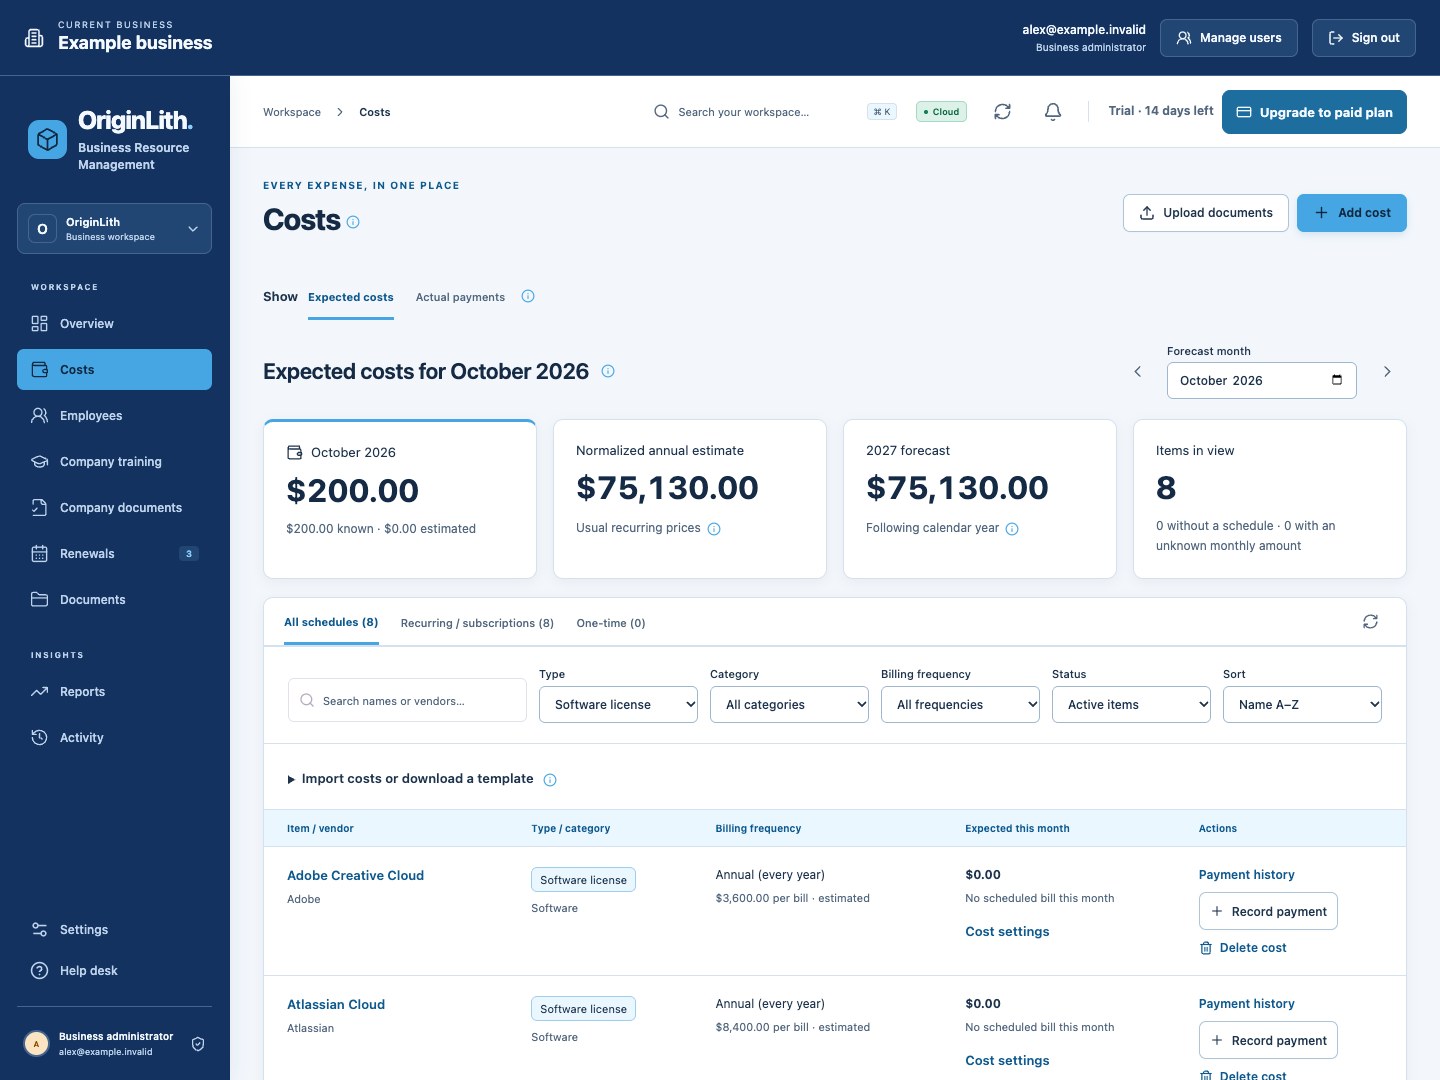
Costs → Expected costs is the single list for software licenses, contracts, subscriptions, usage-based cloud services, and other cost items. Choose Add cost and the item type, or filter the list by type, category, and billing frequency. For AWS, choose Other cost, category Cloud infrastructure, Variable / estimated, and Monthly billing. Its monthly budget is optional; actual bills can vary.
- Choose the software license, contract, or other cost that the bill belongs to.
- While creating a variable/estimated cost item, software license, or contract, expand Add an actual payment (optional) below the estimate to enter a payment in the same form. Save a known-price item first, then record its actual payment separately. For an existing item, select Payments → Record payment; the item is already selected.
- Enter the payment date and the full amount paid in USD, including any tax. Add an invoice reference and payment notes. In Record payment or Edit expense, upload or drop in a receipt, or choose an existing attachment. If you entered a payment while creating the item, open that payment afterward to add its receipt.
- Record refunds as separate Refund received entries using a positive amount. The app subtracts them from payments.
- Select a year and month to review that item’s payments. Choose Export CSV, then select the entire year, one month, or a date range within that year. Narrow the export to payments or refunds if needed. Use Costs → Actual payments for combined business records and additional item filters.
Use Forecast month in Expected costs to move between expected billing months. Adjust a scheduled bill changes a monthly, quarterly, yearly, or other scheduled bill without changing the usual price. Daily and weekly plans offer an explicit monthly-total adjustment. One-time purchases have no recurring adjustment option. The normalized annual amount is a recurring-price comparison, while the following-year forecast uses billing dates and scheduled adjustments. None of these values creates or marks a payment as paid.
Collapsing the actual-payment section keeps any payment you entered. Choose Remove payment if you want to save only the item. If payment recording fails after the item saves, keep the form open and retry; it reuses the saved item and payment request.
Upload one or more files from an item’s Payments tab; the same files appear in its Documents tab and the main document explorer. Use Edit payment in payment history to correct a specific entry. Employee credentials are under Employees → Directory → Licenses & expirations. The Company documents folder includes blank templates and employee copies.
If a priced license and its linked contract represent the same charge, exclude one from cost estimates using its cost settings. This does not change any recorded payments.
Overview includes all cost types in its monthly and annual summaries. If an item has an estimate but no first billing date, its recurring amount still contributes to the normalized annual estimate; set its billing date and frequency to place it in the dated forecasts.
Use Delete cost on a cost row or in its details to remove it from active lists and forecasts. Confirm before removing it. Its payment history, receipts, files, and changes are kept under Inactive / archived items, where Restore cost returns it to the active list.
Use Edit to correct an entry. Use Void to exclude a mistaken entry from totals and the CSV while keeping its history. You can restore it later. Expense tracking is manual; bank synchronization and tax calculations are not included.
04 / BUSINESS CONTRACTS
Keep the agreement with its details.
Open Costs → Add cost → Contract and add the agreement’s name, a short description, counterparty, responsible owners, cost, payment frequency, and expiration date. Use the Type filter to show contracts. Attach the signed agreement and any supporting files, then use Payments to record bills against that agreement.
Use Advanced options for automatic renewal, contacts, and required cancellation notice. If the contract covers a software license, link the two records so the paperwork is easy to find from the license.
05 / EMPLOYEES & TRAINING
Create once. Assign to the right people.
- In Company training, add a reusable training with its due date and refresher requirements.
- Add the Training URL and employee instructions. Explain what the employee needs to do. Manager notes remain separate from the instructions employees see.
- Assign the training to employees or use the applicable team and role options. Review completion status and due dates from the catalog or employee profile.
- Use the employee’s licenses and certifications section for personal credentials, expiration dates, renewal costs, and uploaded certificates.
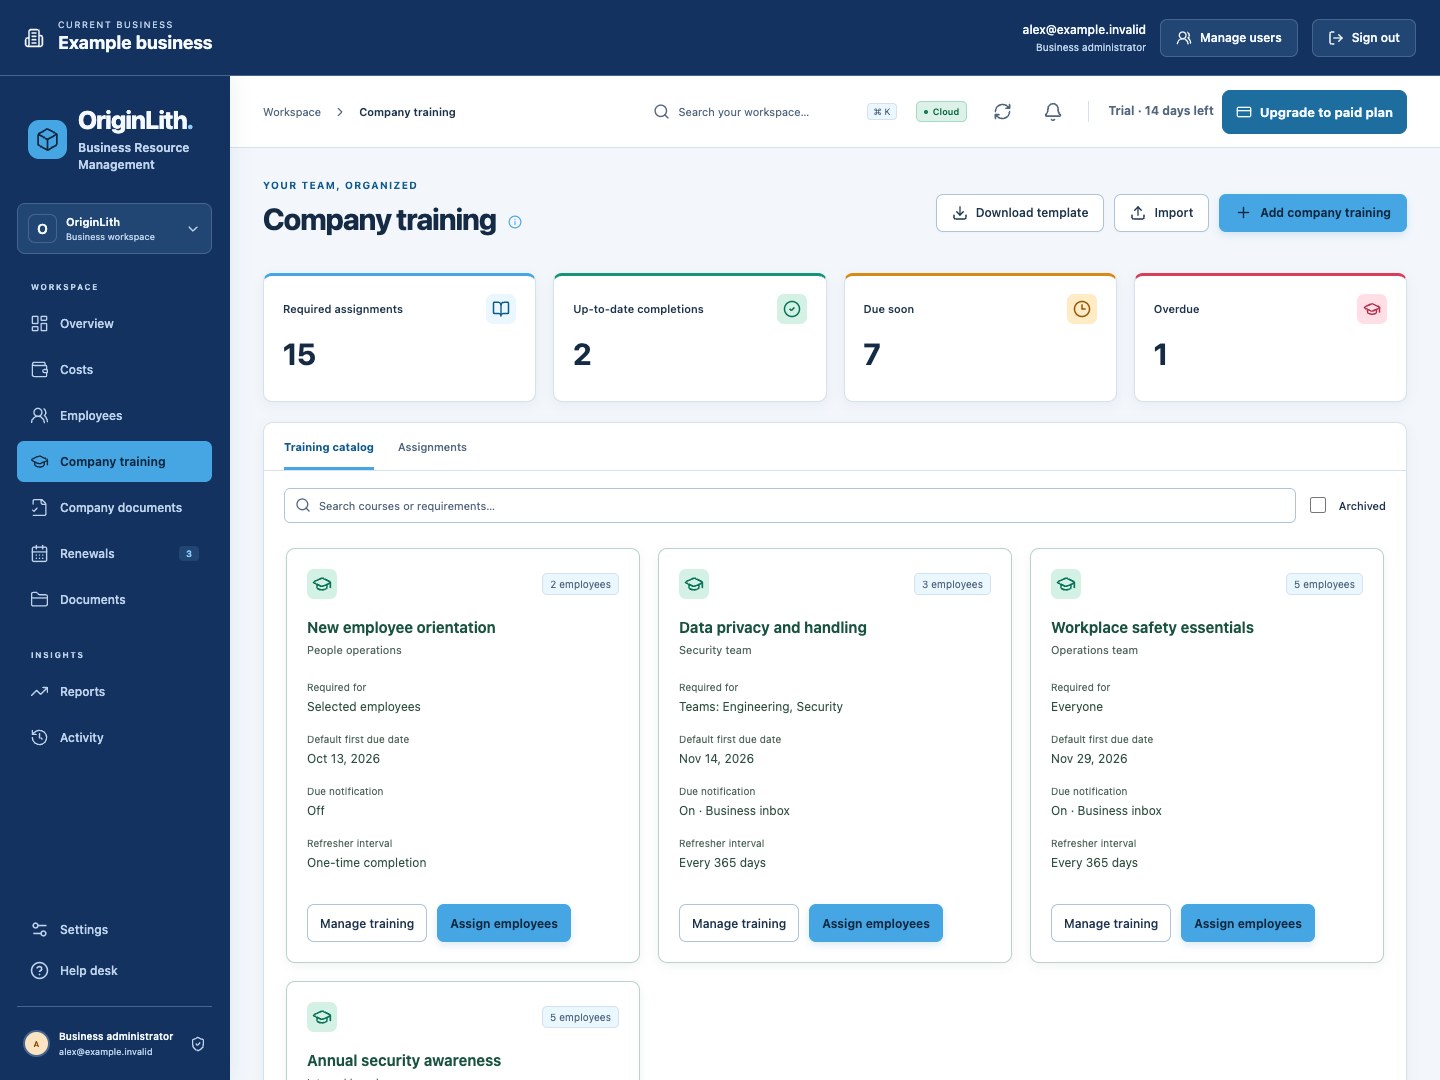
To bring over historical completions, import individual training records from the employee training area. To assign a reusable company training, use the company training assignment workflow.
06 / COMPANY DOCUMENTS
See who has returned their agreement.
- In Company documents, add a document such as an NDA or company agreement, then upload its blank copy.
- Choose Assign employees and set the due date.
- Employees with linked accounts download the agreement, sign it using your business’s accepted method, and upload their signed copy. A manager can also record the copy on their behalf.
- Review the signed, outstanding, and overdue assignments, or choose Export status CSV.
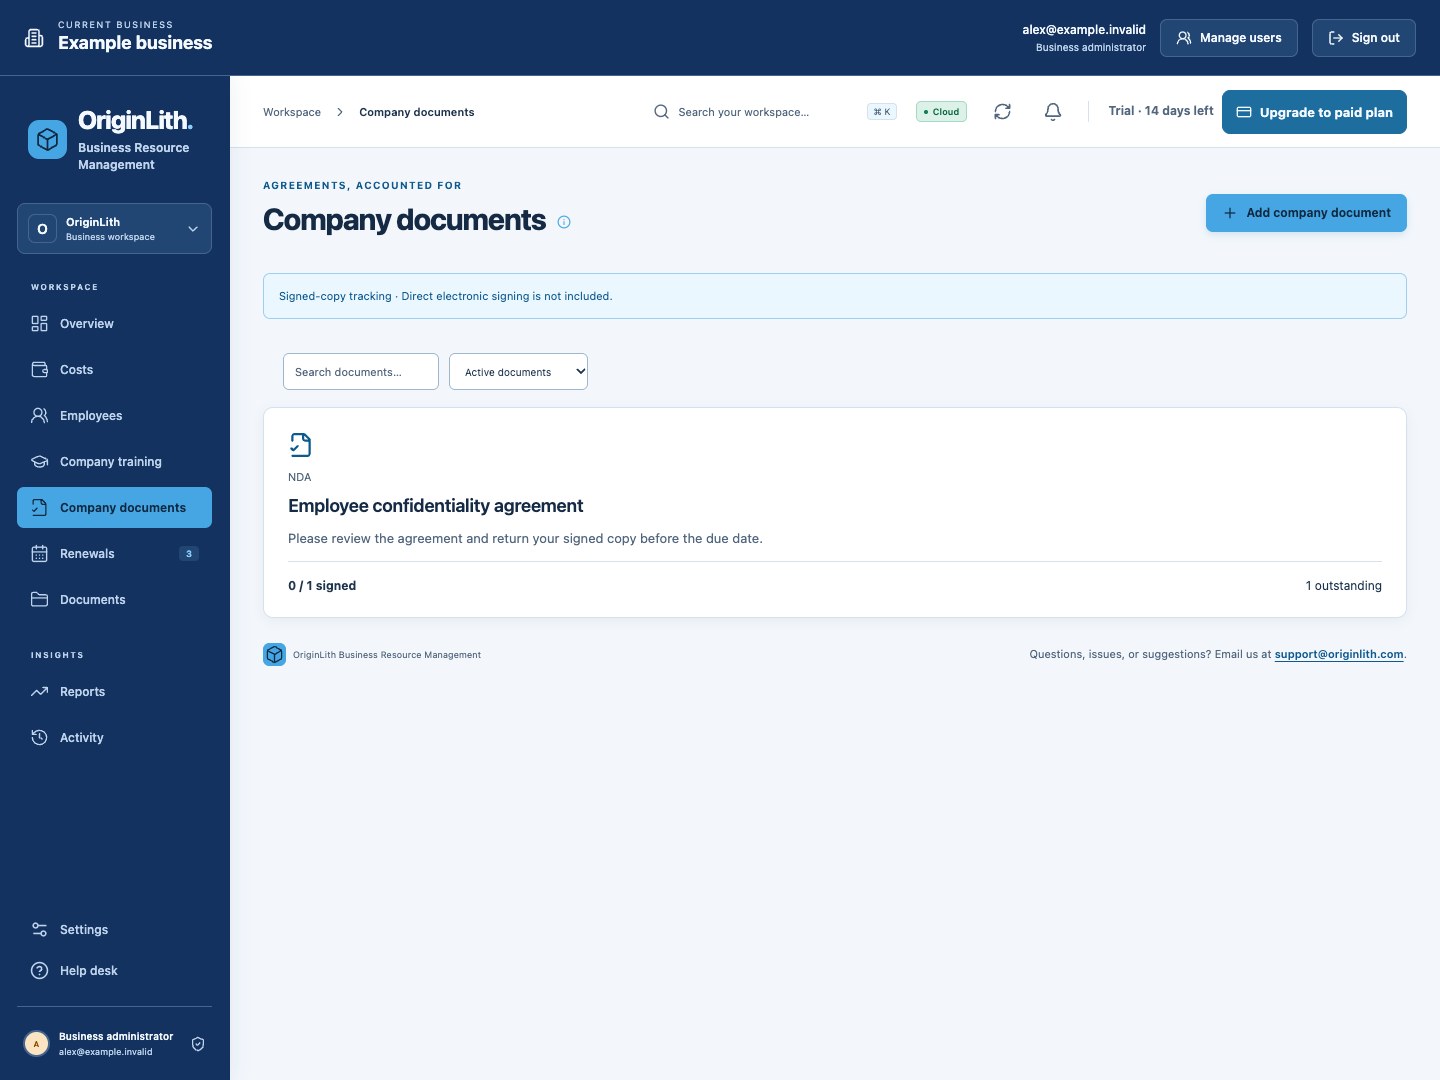
For a revised agreement, create a new company document so the original template remains with its existing assignments.
07 / THE EMPLOYEE VIEW
A clear next step when employees sign in.
Standard employees land on My tasks. They see their own unfinished training, due refreshers, expiring credentials, and agreements awaiting a signed copy. My records holds their broader history and software assignments.
- Training
- Choose View training to see the instructions, deadline, and Open training link. Return after finishing to record completion and upload any evidence. Opening the link does not complete the training.
- Agreements
- Choose Review agreement, download the blank document, and upload the signed copy after signing it.
- Credential renewals
- Choose Review renewal and upload the renewed certificate. An administrator must update the expiration date; uploading a file does not change it.
QUESTIONS & PILOT DETAILS
Get help with your own workflow.
Email support@originlith.com with the screen you’re on and what you’re trying to do. For an error, include the time and time zone. Never send passwords or verification codes. Remove personal and confidential information from screenshots.
What happens after the 14-day trial?
Your records and files stay saved. Business pages, records, exports, and downloads pause until a paid plan reopens the same workspace. Administrators go directly to the Account page to review purchase options; other users should contact their business administrator. Online checkout remains off during the pilot; purchase requests prepare an email and do not start a subscription.
Can I use my own fields or different content?
Contact OriginLith about assisted customization. We can discuss your workflow and what changes are possible. There is not a self-service field designer.
Which features are still planned?
Automatic customer reminder emails, custom domains, direct electronic signing, Jira, and CLI/MCP integrations are planned. The current pilot supports up to 50 active employee profiles; larger plan activation remains pending capacity improvements.
Can someone walk me through it?
Yes. Request a personal demo with a few suitable meeting times and your time zone. This is a walkthrough with OriginLith, separate from starting your own trial workspace.
Request a personal demo